
🎬 Recording
PixWit provides professional recording features: region recording and fullscreen recording, real-time annotation while recording, PIP camera, system sound and microphone recorded separately, and direct output to MP4 / MKV / GIF. By default, press F3 to start recording and press it again to stop; F4 pauses / resumes.
Starting a Recording
Three entry points
| Entry point | Action |
|---|---|
| Main window | Click Record Screen on the toolbar (same as pressing F3) |
| Hotkey | Press F3 to start recording, press F3 again to stop |
| Tray | First set the left / middle / right click action to "Start/Stop Recording" (Settings → General settings → System tray click action), then click the tray icon to start/stop |
Two recording scopes
Choose one in Settings → Recording settings → 🎯 Recording mode:
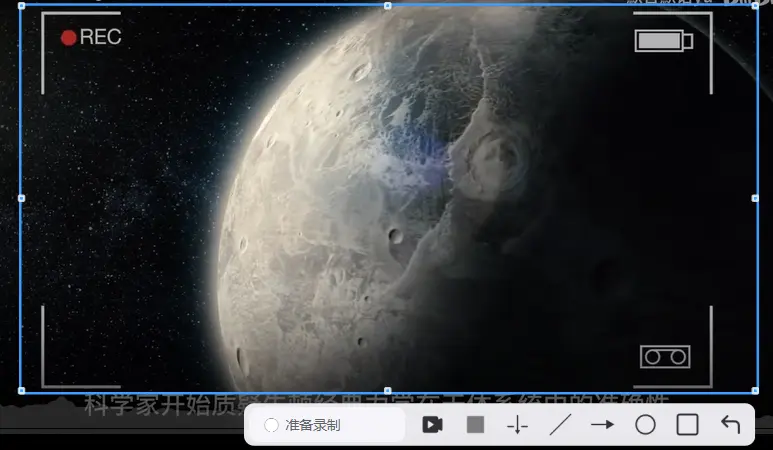
- Region recording (default): first drag a selection box to define the area, then click "Start Recording" on the toolbar; while recording you can still switch between the two scopes from the toolbar.
- Fullscreen recording: records the screen the mouse is on directly (only that one screen, not all screens stitched together).
Screenshot / recording switcher
The screenshot toolbar has a Screenshot/Recording switch button (hover tooltip Switch to recording mode) that lets you switch between screenshot and recording; the button is not shown in the edit window. After switching to recording mode, the toolbar shows only the recording trio: Region/Fullscreen, Video/GIF, Start Recording.
3-second countdown
After you click start there is a 3-second countdown:
- A semi-transparent black circle + digit appears in the center of the screen;
- The text "Recording is about to start..." appears at the bottom;
- During the countdown the mouse clicks pass through, so you can keep working in other applications.
⚠️ Esc does not work during the countdown. If you change your mind, press F3 again, or click the recording button in the main window to cancel.
📷 Illustration placeholder (Figure 1)
3-second countdown — showing the semi-transparent black circle with the digit in the center of the screen and the "Recording is about to start..." text at the bottom To add the image: put the file at docs/public/images/recording-countdown.webp, then delete this tip block and uncomment the next line
Status Indicators While Recording
| Scenario | Indicator |
|---|---|
| Region recording | Red blinking L-shaped corner marks appear at the four corners of the recorded area (they turn green when paused); the toolbar status text goes ⚪ Ready to record → 🔴 Recording 00:00:00 → ⏸️ Paused → ⏳ Processing... |
| Fullscreen recording | A red blinking border runs around the screen (it turns solid green when paused), along with a floating control window |
| Tray | A balloon pops up saying "Region recording started / Fullscreen recording started" and reminding you to "press F3 again to stop recording"; the tray tooltip becomes PixWit - 🔴 Recording (press F3 to stop) |
📷 Illustration placeholder (Figure 2)
Region recording corner marks and control window — ideally shown in one frame: the red L-shaped corner marks at the four corners of the region recording plus the toolbar status text, and the fullscreen recording floating control window (duration and FPS) To add the image: put the file at docs/public/images/recording-control.webp, then delete this tip block and uncomment the next line
Control During Recording
Pause and stop
| Action | Entry point |
|---|---|
| Pause / Resume | Hotkey F4 (only works while recording), the buttons in the fullscreen control window, the region recording toolbar button, the tray menu "⏸️ Pause Recording / ▶️ Resume Recording" |
| Stop | Hotkey F3, "Stop" in the fullscreen control window, "Stop Recording" on the region recording toolbar, the tray menu "⏹ Stop Recording" |
Time spent paused is not counted toward the recording length, and neither picture nor sound is captured while paused.
The fullscreen recording floating control window
- Shows the pause / resume and stop buttons, the elapsed time
00:00:00and the live frame rateFPS: actual/target (percentage). - Clicking the ✕ in the top-right corner while recording asks for confirmation first; confirming stops the recording and discards it.
- UI such as the red frame around the screen and the floating control window is not captured in the video.
Processing after you stop
Once you stop, a "Processing / Processing the recording file, please wait..." dialog appears first; after muxing or transcoding finishes, you move on to the save flow.
What Esc does while recording
While recording, pressing Esc only exits the annotation tools and restores mouse click-through; it does not stop the recording. To stop, use F3 (the recording key toggles start and stop) or click "Stop" on the recording control toolbar.
Mouse and Keystroke Overlays (Recording Effects)
Settings → Recording settings → Recording effects:
| Setting | Default | Effect |
|---|---|---|
| Show mouse click position while recording | On | Draws an orange expanding ring where you click — visible in the video only, never on screen |
| Show pressed keys while recording | Off | Pressed keys appear bottom center of the frame (blue text on a black background, up to 3 at the same time, fading out after about 1.5 seconds) |
| Show mouse cursor while recording | On | The video includes the mouse cursor |
| Show hotkey hint window during fullscreen recording | On | Shows the hotkey hint window during fullscreen recording |
| Show control toolbar during fullscreen recording (not captured) | On | Fullscreen recording shows the control toolbar, and that toolbar is not captured in the video |
Annotating While Recording
The annotation tools are reached slightly differently on the two recording paths:
| Path | Available buttons |
|---|---|
| Region recording (selection toolbar) | Restore mouse click-through (press Esc), line annotation, arrow annotation, circle annotation, rectangle annotation, undo annotation |
| Fullscreen recording (control window) | Pen, line, arrow, circle, rectangle, undo, style (color and thickness) |
Default hotkeys (registered only while recording)
| Hotkey | Function |
|---|---|
| Alt+I | Draw a line |
| Alt+J | Draw an arrow |
| Alt+O | Draw a circle |
| Alt+K | Draw a rectangle |
| Alt+Esc | Exit annotation (restore mouse click-through) |
These hotkeys are registered only while a recording is in progress and stop working once it ends; you can change them in Settings → Hotkey Settings → 🎨 Recording annotation hotkeys, where "Restore Defaults" resets them all in one click.
Key points
- When no annotation tool is selected, mouse clicks pass straight through, so your work in other applications is unaffected; select a tool and you can start drawing on the screen.
- Hold Shift with the circle / rectangle tool to constrain it to a perfect circle / square; press Esc to cancel the current annotation tool and restore mouse click-through.
- The area occupied by the control toolbar is an exclusion zone — you cannot annotate on top of it.
- Mouse clicks and keystroke overlays during recording also end up in the video.
- If Allow screenshot while recording is ticked under 📸 Screenshot while recording, no annotation window is created during recording — in other words, you cannot annotate while recording (this option is off by default).
PIP Camera
- Switch: Recording settings → 📹 Camera (PIP) → Enable PIP (fullscreen recording only), off by default; ticking it automatically switches to fullscreen recording (region recording does not support PIP).
- Selecting a device: click 🔍 Detect camera first, pick the device in the dropdown (the first entry is "Do not use camera"), then verify the picture with 👁️ Preview camera.
- Position: while recording the camera picture is fixed in the bottom-right corner of the recorded screen (320px wide, with the height following the camera aspect ratio); left-drag the preview window to move it, and that position is the position in the final video. The camera resolution is picked automatically for the best result.
- Failure messages (verbatim):
No camera detected, so PIP recording cannot be enabled. Please connect a camera and try againCamera warm-up failed, so PIP recording cannot be startedCannot start the camera, PIP recording failed. Please check whether the camera is in use by another program
📷 Illustration placeholder (Figure 3)
PIP camera — showing the 320px-wide camera preview window in the bottom-right corner and the "Detect camera / Preview camera" buttons in Recording settings To add the image: put the file at docs/public/images/recording-camera-pip.webp, then delete this tip block and uncomment the next line
Audio
The audio source is a four-way choice in Recording settings → 🔊 Recording sound (there is no dialog asking you to pick one on the first recording):
| Option | Description |
|---|---|
| Muted (no sound) | Records no audio at all |
| System sound (recommended) | The default option, records what the computer plays |
| Microphone | Records the microphone only |
| System sound + Microphone | Records both tracks at once; the "🔉 Volume control" group only appears in this case |
- GIF is forced to mute: with the GIF format the sound is forced to "Muted" (GIF does not support audio); switching back to MP4 / MKV automatically selects "System sound" again.
- Volume control: system sound defaults to 100% and the microphone to 150%, with a range of 0–500%.
- Detect microphone / Recording test / Play: once a device is detected you can record a 2-second clip to listen back and confirm the microphone works.
- Permission hint: if the system has not granted microphone access, PixWit tells you to turn on access in Windows Settings > Privacy and security > Microphone and allow desktop apps to use it.
No sound in your recording?
First check whether "Recording sound" is set to "Muted"; with "System sound + Microphone" you can adjust each of the two tracks separately under "🔉 Volume control".
Output Format and Quality
| Setting | Options | Description |
|---|---|---|
| 📼 Output format | MP4 video (recommended, best compatibility) / MKV video (advanced, more reliable) / GIF animation | MP4 by default |
| 🎬 Video quality | Sharp (larger files, best quality, CRF 18) / Balanced (recommended, CRF 23) / Compressed (smallest files, CRF 28) | Balanced by default; the group still applies to GIF, where it decides the palette size and dithering |
| 🎞️ Frame rate | 1–120 fps, 15 by default; presets 6 / 10 / 15 / 20 / 30 / 60 fps | Disable adaptive frame rate (force the configured frame rate) is off by default; while recording the FPS: actual/target readout reflects performance, and optimization advice appears when too many frames are dropped |
| 🎨 GIF advanced settings | ⚡ Fast mode (default, finishes the moment you stop) / 🎬 Standard mode (processed after stopping, better quality) / 🎨 Best quality (two-pass palette analysis) | Shown only when GIF is selected |
| ⚙️ Encoding and performance | Prefer hardware encoding (recommended, lowers CPU usage) on by default; 🔍 Detect available encoders | Shows the recommended encoder (such as h264_nvenc (NVIDIA GPU acceleration)); when hardware encoding is unavailable it falls back to CPU encoding automatically. If you run into corrupted frames / a black screen / a failure to start, turn hardware encoding off |
Other Recording-Related Behavior
- Segmented recording: long recordings are split automatically into 10-minute segments and merged when you stop; there is no switch for this in the UI. If merging fails you get
Video segment merging failed, and the post-stop processing simply takes longer. - Low-spec mode (Settings → General settings): caps the recording frame rate at 10fps and turns off the mouse click and keystroke overlays.
- The first time you record, PixWit prompts you to download the video encoding component (about 94MB); it is a one-time download and works offline afterwards.
Finishing a Recording
- A save dialog opens (titled
Save VideoorSave GIF).- The default file name is built from the prefix (default
PixWit_Recording) in Saving settings + the separator (default_) + a timestamp; - The default directory is the last folder you saved to, or the desktop.
- The default file name is built from the prefix (default
- When saving finishes, a
Recording completedialog appears with the full path and three buttons:- ▶️ Open (🖼️ Open for GIF, which also copies the path to the clipboard)
- ✂️ Edit
- 📂 Open folder
- Clicking ✂️ Edit opens the
Edit audio/videowindow for a video (6 tabs: ✂️ Trim / 🗜️ Compress / ⚡ Speed / 🔄 Convert / 🎙️ Dub / 🔪 Audio split) and theEdit GIF animationwindow for a GIF (4 tabs: Trim / Speed / Resize / Frame editing). - If you click Cancel in the save dialog, the temporary files from this recording are deleted.
Further reading: Complete video editing tutorial.
Recording Settings Quick Reference
Entry point: right-click the tray icon → Settings... → 🎥 Recording settings (11 groups in total).
| Group | Main settings | Default |
|---|---|---|
| 🎯 Recording mode | Region recording / Fullscreen recording | Region recording |
| ⚙️ Encoding and performance | Prefer hardware encoding, detect available encoders | Hardware encoding first |
| Recording effects | Mouse cursor, mouse click position, keystrokes, fullscreen hotkey hints, fullscreen control toolbar | All on except keystrokes |
| 📹 Camera (PIP) | Enable PIP, select camera, detect / preview | Off |
| 📸 Screenshot while recording | Allow screenshot while recording | Off |
| 📼 Output format | MP4 / MKV / GIF | MP4 |
| 🎨 GIF advanced settings | Fast / Standard / Best quality | Fast mode |
| 🎬 Video quality | Sharp / Balanced / Compressed | Balanced |
| 🎞️ Frame rate | Frame rate value and presets, disable adaptive frame rate | 15 fps |
| 🔊 Recording sound | Muted / System sound / Microphone / System sound + Microphone | System sound |
| 🔉 Volume control | System sound, microphone (shown only when both are recorded) | 100% / 150% |
Don't forget to click "Apply" or "OK"
Changes on the Recording settings page are only saved after you click Apply or OK at the bottom of Settings; clicking "Cancel" discards them.
📷 Illustration placeholder (Figure 4)
Recording settings page — showing the groups for recording mode, encoding and performance, recording effects, camera, output format, GIF, frame rate, sound and so on To add the image: put the file at docs/public/images/recording-settings.webp, then delete this tip block and uncomment the next line
Clarifying Outdated Tutorial Claims
| Outdated claim | What the manual actually does |
|---|---|
| "The first recording prompts you to choose an audio source: microphone only / system sound only / mixed / muted" | ❌ No such first-run dialog exists. The four options are Muted / System sound (default) / Microphone / System sound + Microphone, chosen in Settings → Recording settings → 🔊 Recording sound |
| "Recording has no 3-second countdown" | ❌ Clicking start gives you a 3-second countdown (semi-transparent black circle with a digit in the center of the screen, "Recording is about to start..." at the bottom, mouse clicks pass through) |
| "Esc cancels the countdown" | ❌ Esc does not work during the countdown; to back out, press F3 again or click the recording button in the main window |
| "The camera cannot be used while recording" | ❌ The PIP camera is supported (fullscreen recording only); it is off by default and ticking it switches to fullscreen recording automatically |
| The entry point is written as "tray → Recording settings" | ❌ It is always Settings → Recording settings (right-click the tray icon → Settings...) |
| "The pause / stop hotkeys are F6 / F7" | ❌ The defaults are F4 pause / resume (only while recording) and F3 start / stop; change them in Settings → Hotkey Settings |
Related Pages
- Complete video editing tutorial — edit audio/video, compress, change speed, convert formats, edit GIF animations
- Hotkey reference — all global hotkeys and recording annotation hotkeys